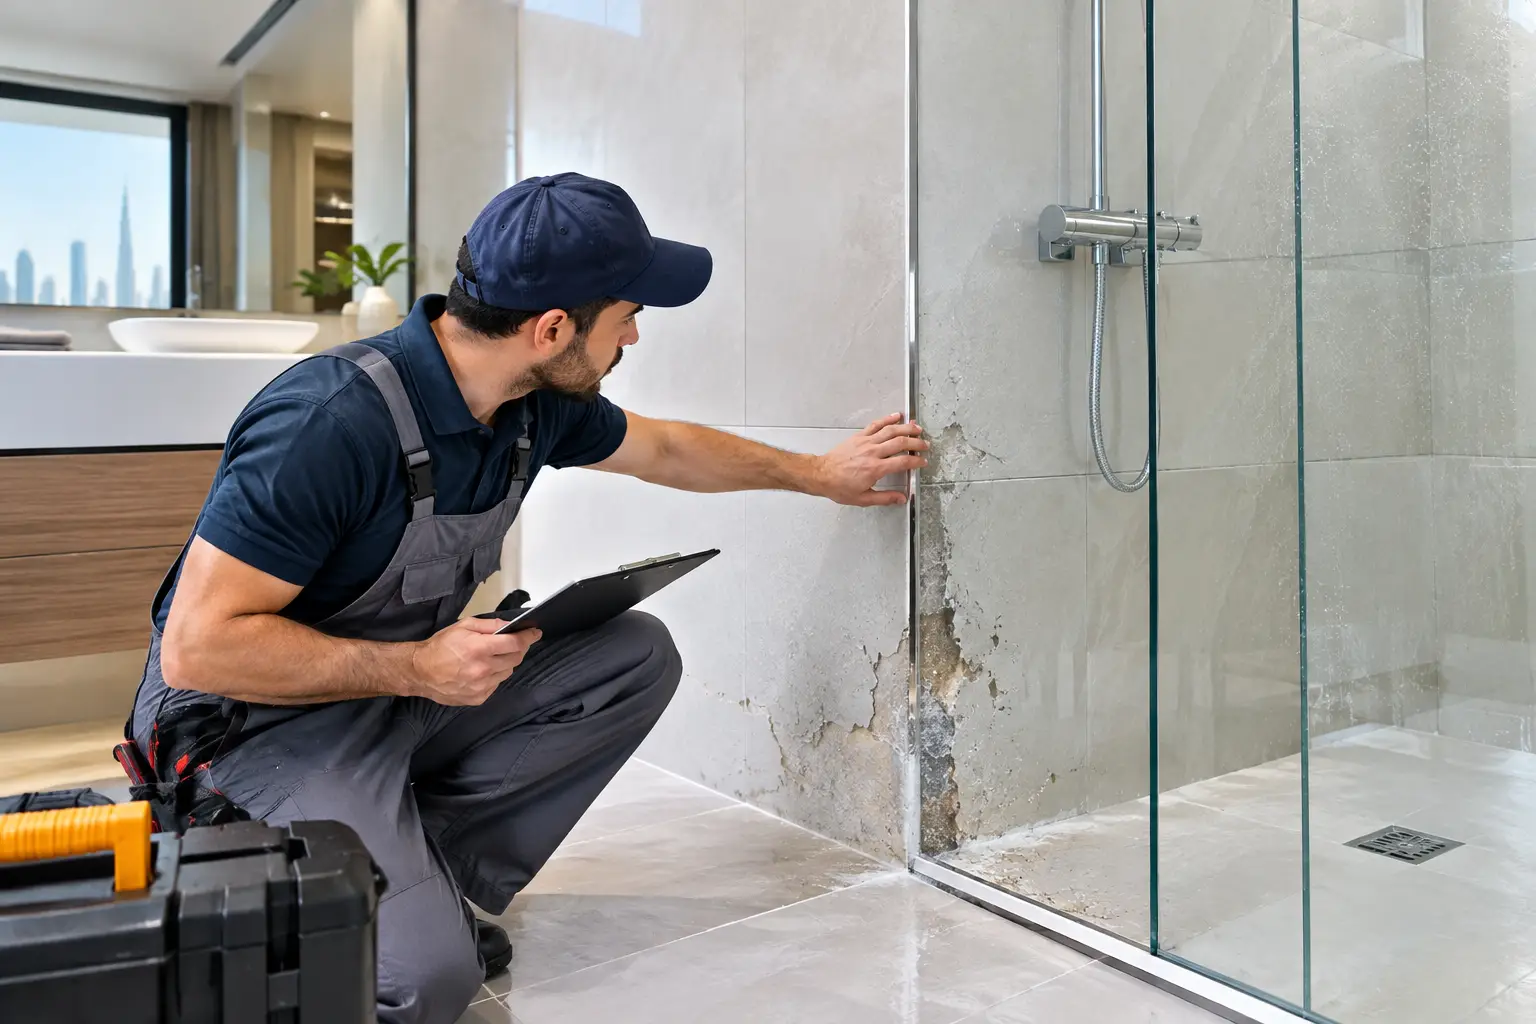
A shower can look newly finished while water is already moving behind the tile. This is what makes shower waterproofing failures so costly: the visible surface may remain clean and intact while moisture damages screeds, walls, ceilings below, adjacent joinery, and finishes in nearby rooms.
For villa and apartment owners, especially where bathrooms sit beside wardrobes, timber wall panels, or high-value flooring, waterproofing is not a minor concealed detail. It is a core part of the bathroom’s construction system. Tile, grout, and silicone create the finished appearance, but the waterproofing layer behind them is what must manage daily water exposure over many years.
Why shower waterproofing failures happen
Most failures do not come from one dramatic error. They usually develop where several execution details have not been coordinated: substrate preparation, membrane application, drain connection, pipe penetrations, tile installation, and final sealing. A bathroom contractor may complete each item individually, yet still leave a path for water if the system is not treated as one continuous assembly.
The most common misconception is that tiles and grout are waterproof. They are not. Tile finishes resist water at the surface, but grout joints, perimeter corners, fittings, and movement joints can allow moisture through. The waterproofing membrane below must be continuous and correctly connected to the floor drain and wall upturns.
In Dubai and Sharjah properties, bathrooms may also be exposed to strong air-conditioning differentials, regular shower use, and alterations during renovation. These conditions make careful substrate assessment and disciplined installation particularly valuable. Existing moisture, uneven screeds, concealed plumbing changes, or cracked bases should be resolved before the finishing stage begins.
The warning signs of shower waterproofing failures
A persistent damp smell is often an early clue, particularly in a bathroom that is otherwise well ventilated. Other signs include darkened grout that returns soon after cleaning, peeling paint on the opposite side of a shower wall, swollen skirting, staining on a ceiling below, or silicone joints that repeatedly separate.
Not every symptom confirms a failed membrane. A leaking mixer valve, damaged waste connection, condensation around chilled pipework, or a shower screen that directs water outside the wet area can produce similar evidence. The right response is investigation, not assumptions. Removing tiles before identifying the water source can add unnecessary disruption without solving the problem.
Damage can spread beyond the bathroom
Water follows the easiest available route. It may travel along a floor screed, around a pipe sleeve, through a wall junction, or into a slab opening before it becomes visible. By the time staining appears in an adjacent bedroom, corridor, or lower-level ceiling, the affected area may be wider than the original shower footprint.
This is especially relevant during premium apartment and villa renovations. Moisture can affect custom vanity units, wardrobes behind shared walls, engineered flooring outside the bathroom, wallpaper, wall cladding, and electrical components. A contained shower defect can quickly become a broader interior repair issue.
Where waterproofing systems most often fail
The floor-to-wall junction is one of the most vulnerable areas. This is where horizontal and vertical surfaces meet and where minor building movement can stress a rigid or poorly reinforced membrane. Proper waterproofing should turn up the wall to the required height, with reinforcement tape or fabric used at changes of plane according to the approved system.
Drain detailing is equally critical. A membrane that stops near the drain rather than bonding correctly to a compatible drain flange leaves a direct route for water into the slab or screed. The floor must also be formed with a consistent slope toward the drain. Waterproofing cannot compensate for standing water caused by poor falls.
Pipe penetrations require the same attention. Shower mixers, body jets, hand-shower outlets, and niche lighting points interrupt the waterproofed surface. Each penetration needs a compatible collar, seal, or detailing method. Relying only on face silicone around a fitting is not sufficient because silicone is a maintenance item, not the primary waterproof barrier.
Shower niches are another frequent weak point. Their horizontal base must drain toward the shower, and the inside corners need continuous membrane coverage. A niche that looks precise at handover can become a moisture trap if its slope, reinforcement, or tile edge treatment has been overlooked.
Poor preparation undermines good materials
Even a high-quality membrane can fail when applied to the wrong substrate. Dusty surfaces, weak screed, loose render, surface laitance, old adhesive residue, or moisture outside the manufacturer’s permitted range can prevent proper adhesion. Cracks in the base should also be assessed rather than simply covered with tile adhesive.
Thickness matters. Liquid-applied systems require the specified number of coats and the correct dry film thickness. Applying material too thinly, missing corners, or rushing the curing period creates weak areas that may not be visible once tilework starts. Sheet membranes have different risks: incomplete overlaps, unsealed seams, and poorly finished transitions around drains and corners.
This is why a specification should identify a complete, compatible system rather than a collection of unrelated products. Primer, membrane, reinforcing tape, sealants, drain components, adhesive, and grout should be selected with the substrate and shower design in mind. Compatibility and installation sequence are as important as the brand of any single product.
Testing before tilework protects the project
A flood test is one of the most practical quality-control steps in a shower renovation. After the waterproofing has cured, the drain is temporarily sealed and the shower base is filled to a controlled level. The area is then monitored for the required test period before tile installation begins.
The test does not replace visual inspection. The installer should confirm membrane coverage at corners, wall upturns, niches, pipe penetrations, and drain connections before water is introduced. Photographs of these concealed stages also create a useful project record for the owner, consultant, and future maintenance team.
Testing has a trade-off: it adds time before finishes can proceed. However, it is far less disruptive than removing porcelain tile, a vanity, and finished ceilings to address a leak after handover. On a coordinated turnkey fit-out, this short inspection stage protects the schedule rather than threatening it.
Repair planning depends on the source and extent
A localized leak around a fitting or failed silicone joint may be repaired without rebuilding the entire shower, provided the waterproofing layer behind the finish remains sound. A plumbing pressure test and targeted moisture assessment can help define that scope.
Where the membrane has failed at the drain, floor-to-wall junctions, or several penetrations, a more comprehensive repair is usually the responsible option. This often means removing affected tiles and screed, correcting substrate or plumbing issues, installing a new waterproofing system, testing it, and then reinstating finishes. Trying to patch a widespread concealed failure from the face of the tile can postpone, rather than prevent, further damage.
The repair approach also depends on the bathroom design. A curbless shower, large-format porcelain, stone cladding, linear drain, built-in bench, or integrated niche demands detailed sequencing. The finished bathroom should retain its intended lines and drainage performance while the concealed layers are rebuilt correctly.
A coordinated execution process makes the difference
Waterproofing works best when managed alongside plumbing, civil works, tile setting, joinery, and finishing. If these scopes are split between separate teams without clear responsibility, critical details can fall between them. The plumber may complete pipework, the tiler may set the drain, and the waterproofing applicator may be asked to work around both after the fact.
A single execution team can coordinate the correct order: inspect the substrate, finalize plumbing positions, prepare levels and falls, apply the system, complete testing, then proceed with tilework and final fixtures. This also helps protect adjacent custom elements such as vanity joinery, wall panels, and doors during the work.
Time Furniture approaches bathroom renovation as part of the wider interior project, coordinating the concealed construction details with the final finishes and custom elements around them. That accountability is particularly valuable when a bathroom upgrade is connected to a larger villa or apartment renovation.
Before approving a shower finish, ask to understand what sits behind it: the waterproofing system, the drain detail, the floor slope, the treatment of corners and penetrations, and the planned test procedure. Those decisions are rarely visible at handover, but they are what allow a well-finished bathroom to remain a well-performing one.